
Project Example of How we designed the
The Kelvin Kitchen
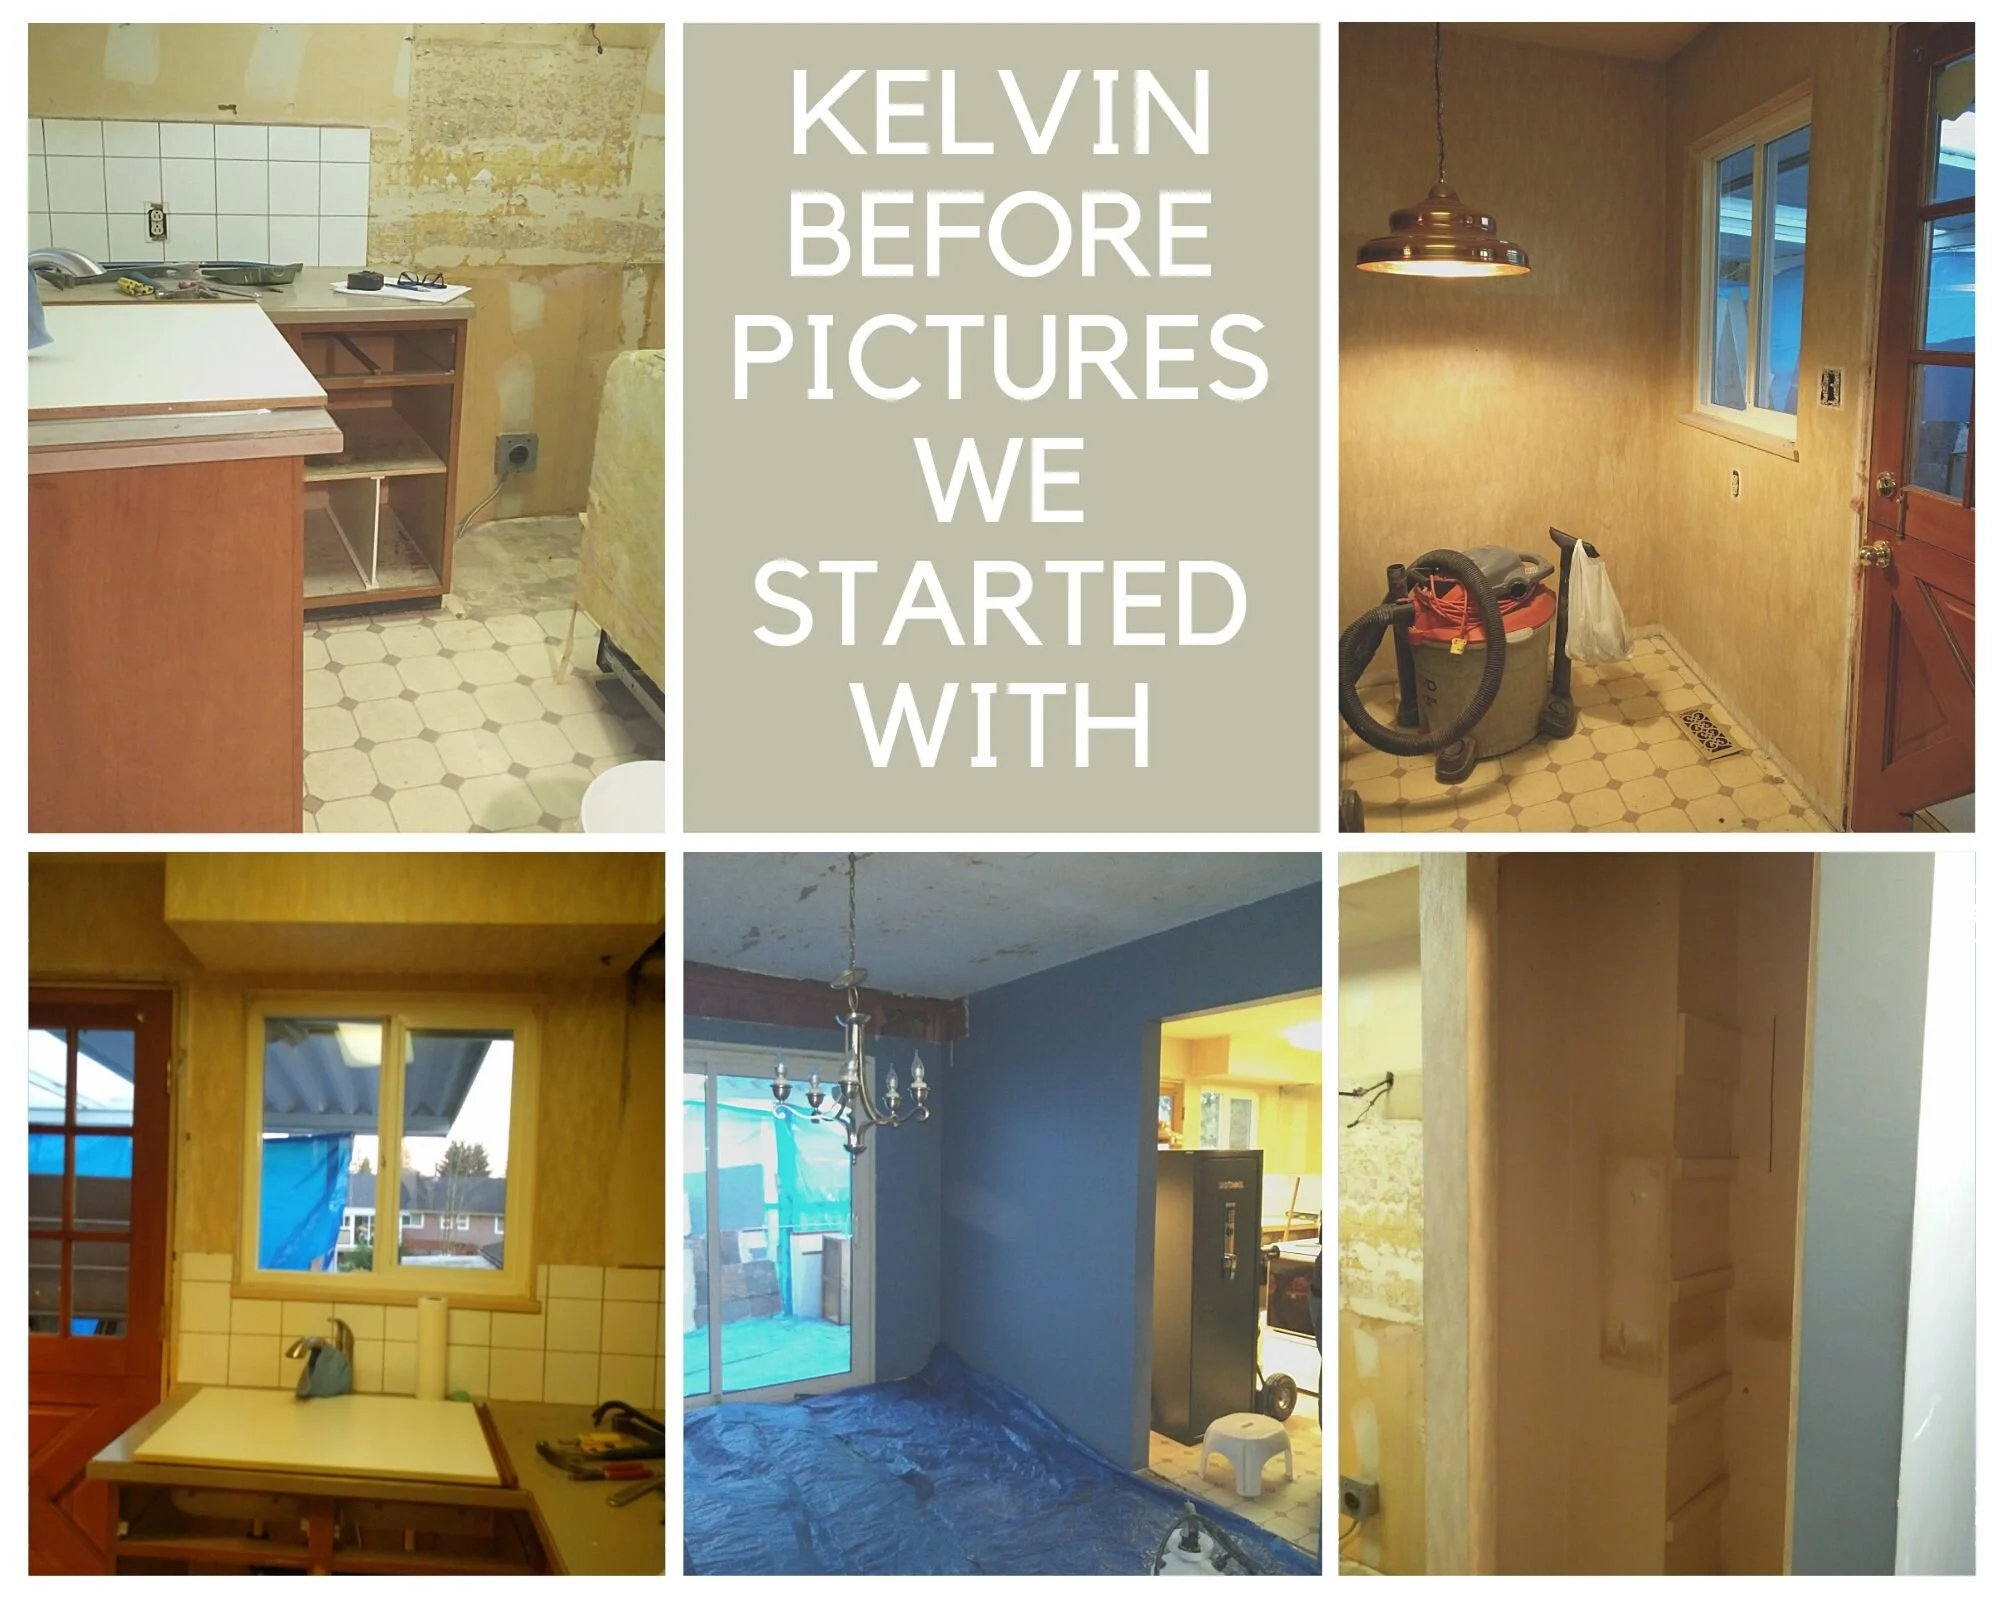
Creating a Kitchen Story going from a dated, dingy, closed space to a mid-century modern look with a breath of fresh air
Project Objectives:
We understood through Design Discovery & Initial Consultation what clients needed & proposed a Design Direction:
Just bought the house & wanted to create an open & clean look
Family required more counter space & storage options maximizing space
A very neutral color & material palette was desired with plenty of light
Open Kitchen Concept with more room for more than one cook
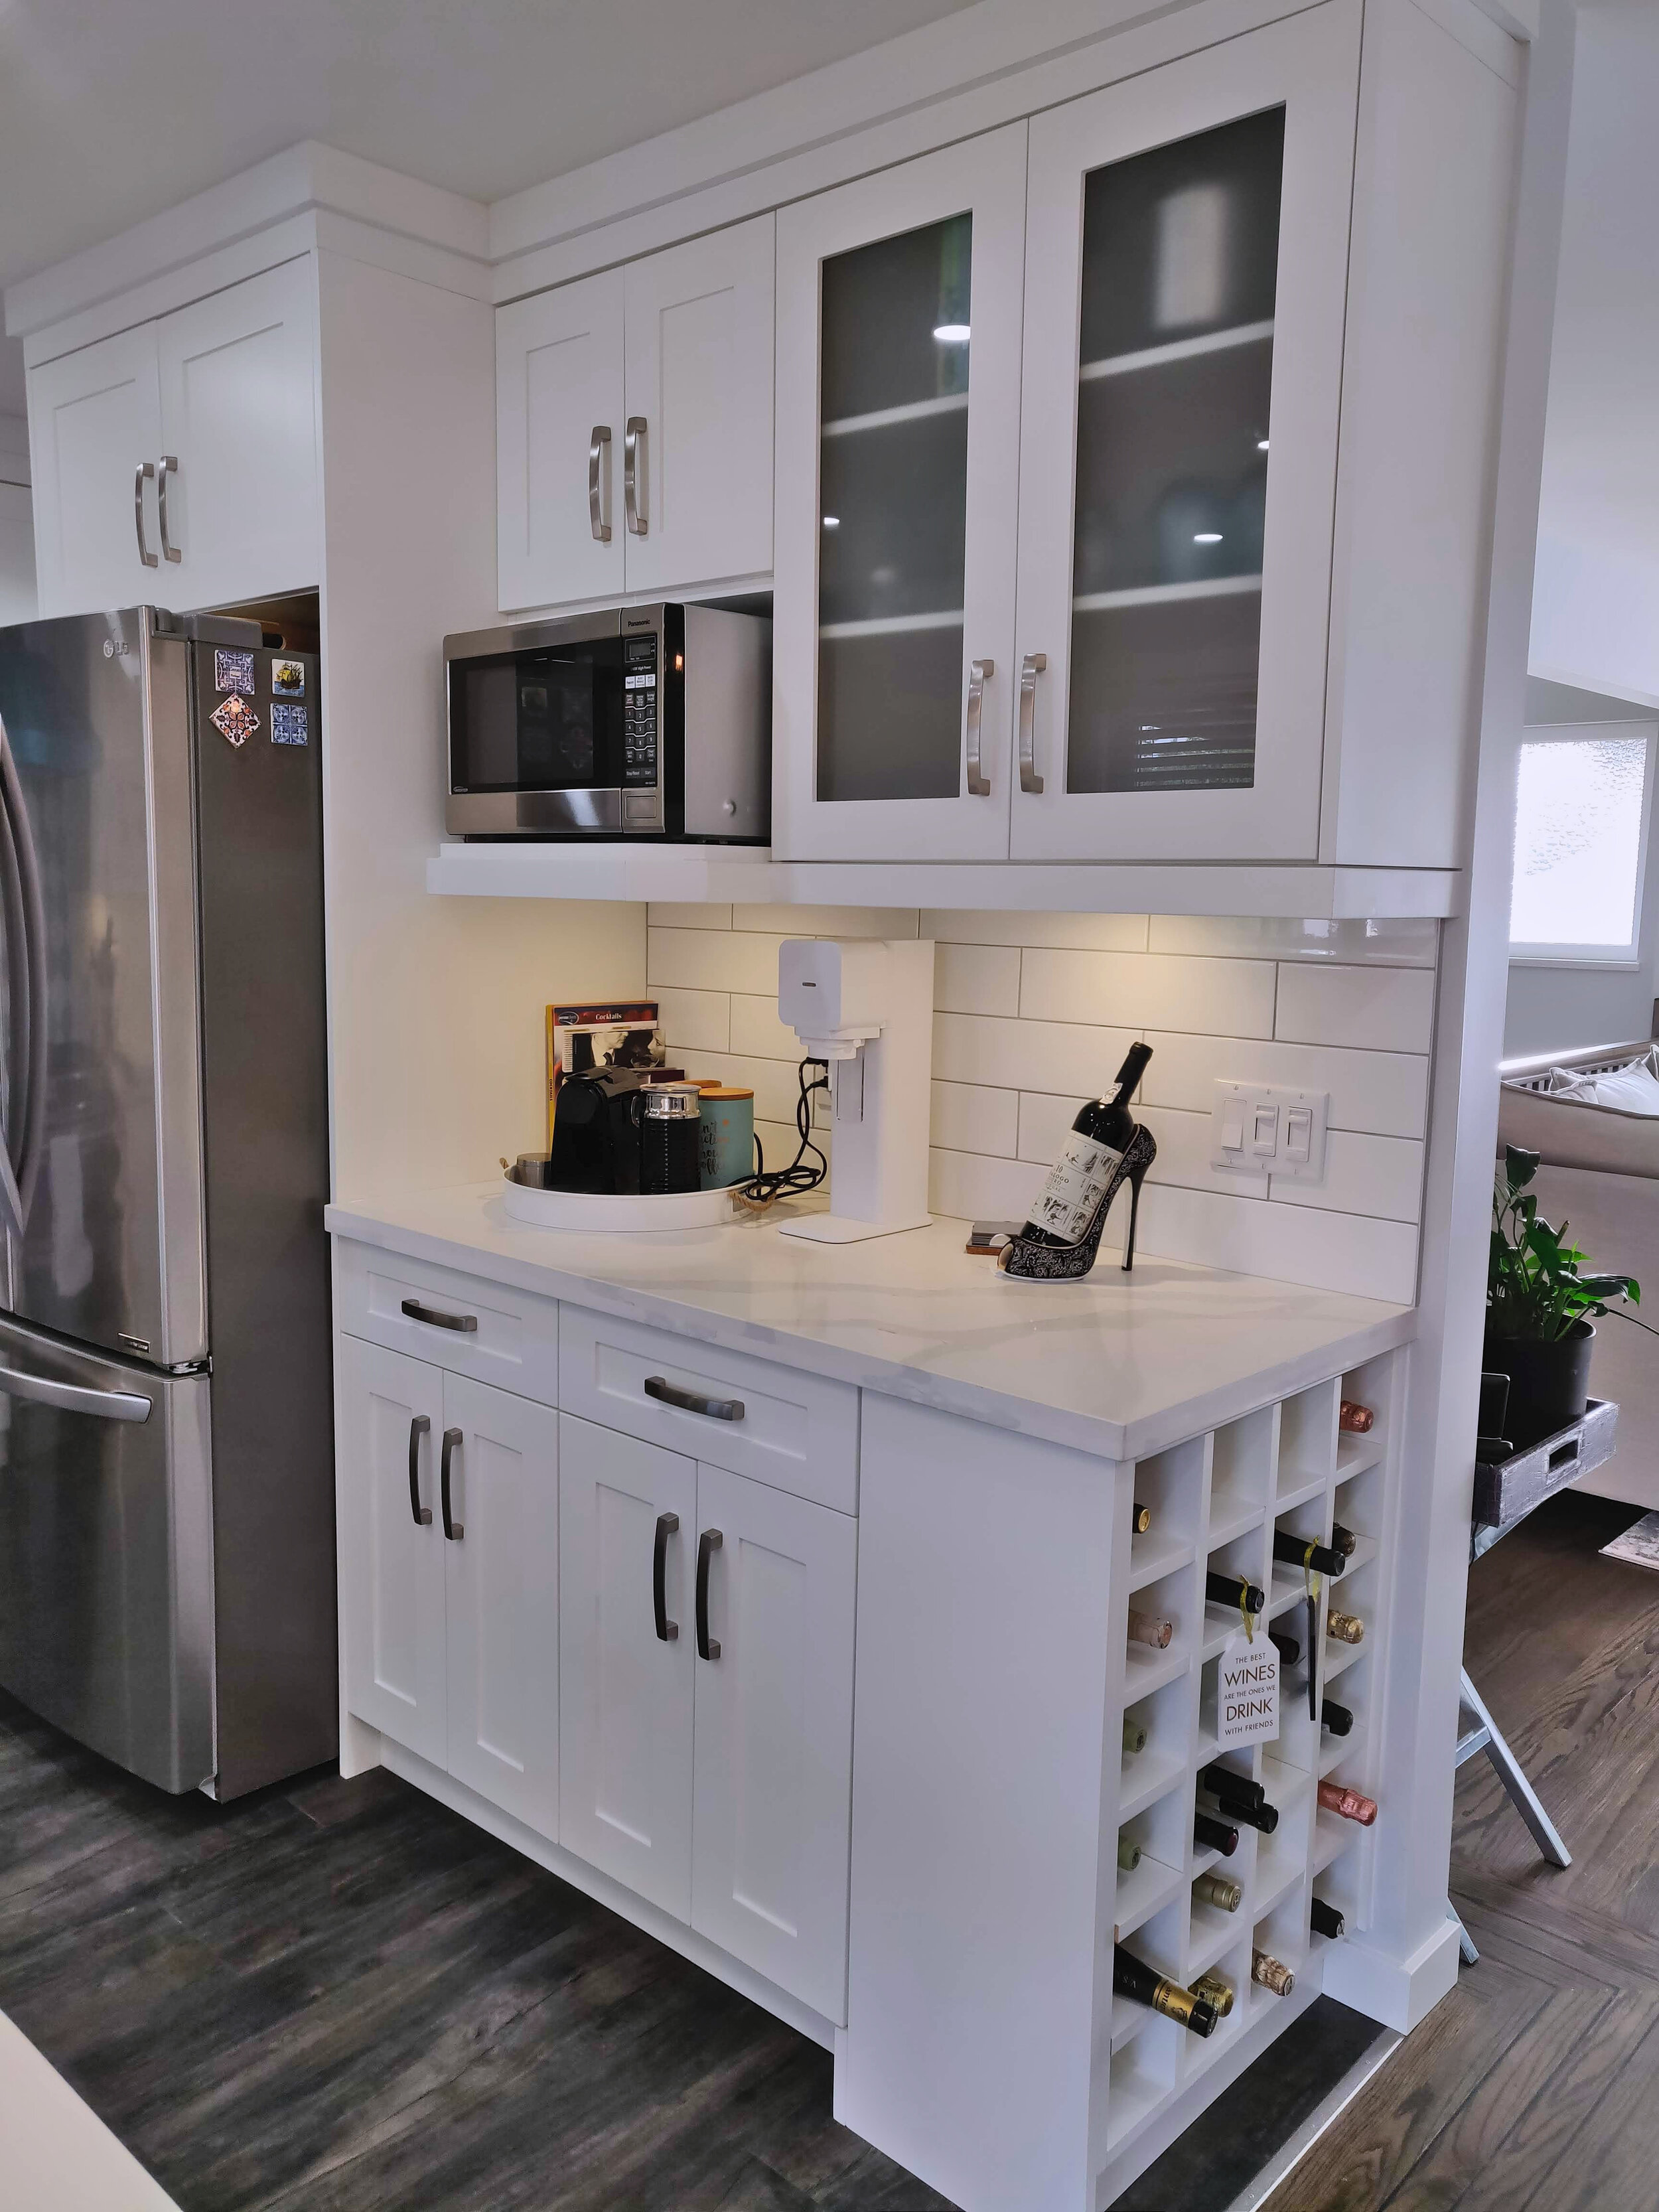
A simple design was desired with a designated Coffee Station & easy access to wine bottles
2. Exploring Design Concepts:
We started exploring different possibilities of floor plan and came up with 2 different options
Exterior Kitchen wall had too many opening. So minimize that and provide one source of light & view
To get more counter space and create an open plan the wall between Kitchen & Dining needed to go

ORIGINAL FLOOR PLAN
Modification of exterior wall, taking out both windows and door. Inserting one big window and centering sink to it
More wall space was obtained to have more wall cabinets and more counter space
Adjustments in floor space to include an island. Clearances and passages needed to be checked between island and cabinets on both sides

CONCEPT DESIGN - 1ST OPTION
Modification of exterior wall to include an even wider window as natural light in the kitchen was very important
Substituted island with peninsula resulting in a more continuous counter space and include a breakfast counter
Kept original position of refrigerator, created a coffee station, tall storage cabinets beside range.
Floor space opened up even more and cooking & cleaning activities could be performed without interruption
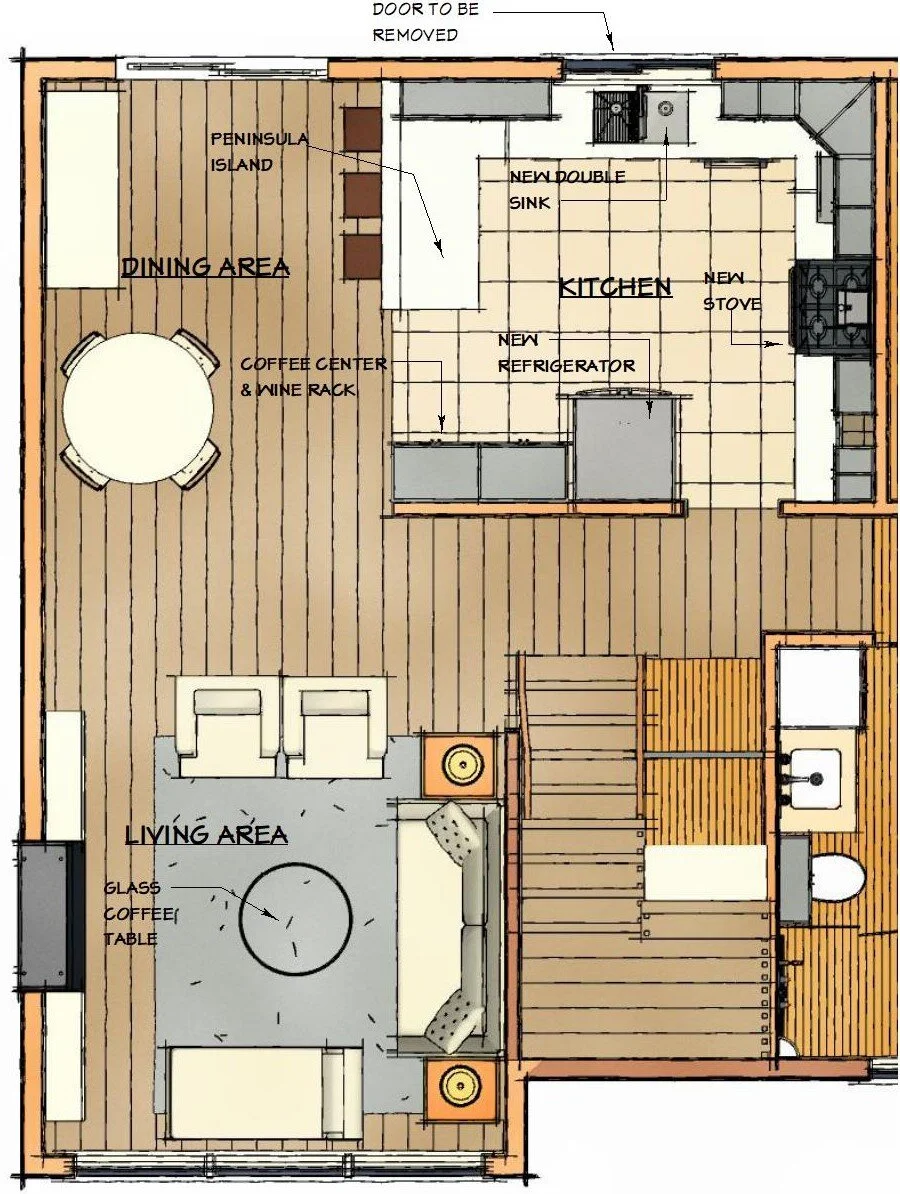
CONCEPT DESIGN - 2ND OPTION
3. Working on Chosen Concept:
Once the options were reviewed clients chose few elements from each Option 1 & 2 and we finalized the floor layout.

CHOSEN OPTION SKETCH 1

CHOSEN OPTION SKETCH 2
Details were slowly included into the space with the Final Design Concept and the space came to reality in rough drawn sketches
Cabinet edge details were chosen, layout of cabinets were worked on to determine what item is stored where
Width of each cabinet was finalized, shelving height were calculated, pullout drawers and spice pullouts were located
Hardware size, door open direction, appliance sizes determined

CHOSEN OPTION SKETCH 3
4. Design Concept Realistic Renderings:
Realistic Renderings provide clarity of understanding to clients
The space comes alive with color, surface finishes and lighting
Depth of space is more visual and sizes and heights of cabinets, counters are clear
Placement of accessories and presentation with a 3D walkthrough excites clients and enables them to think about material finish choices & budgets

3D RENDERED DESIGN 1

3D RENDERED DESIGN 2

3D RENDERED DESIGN 3
5. Construction & Project Execution:
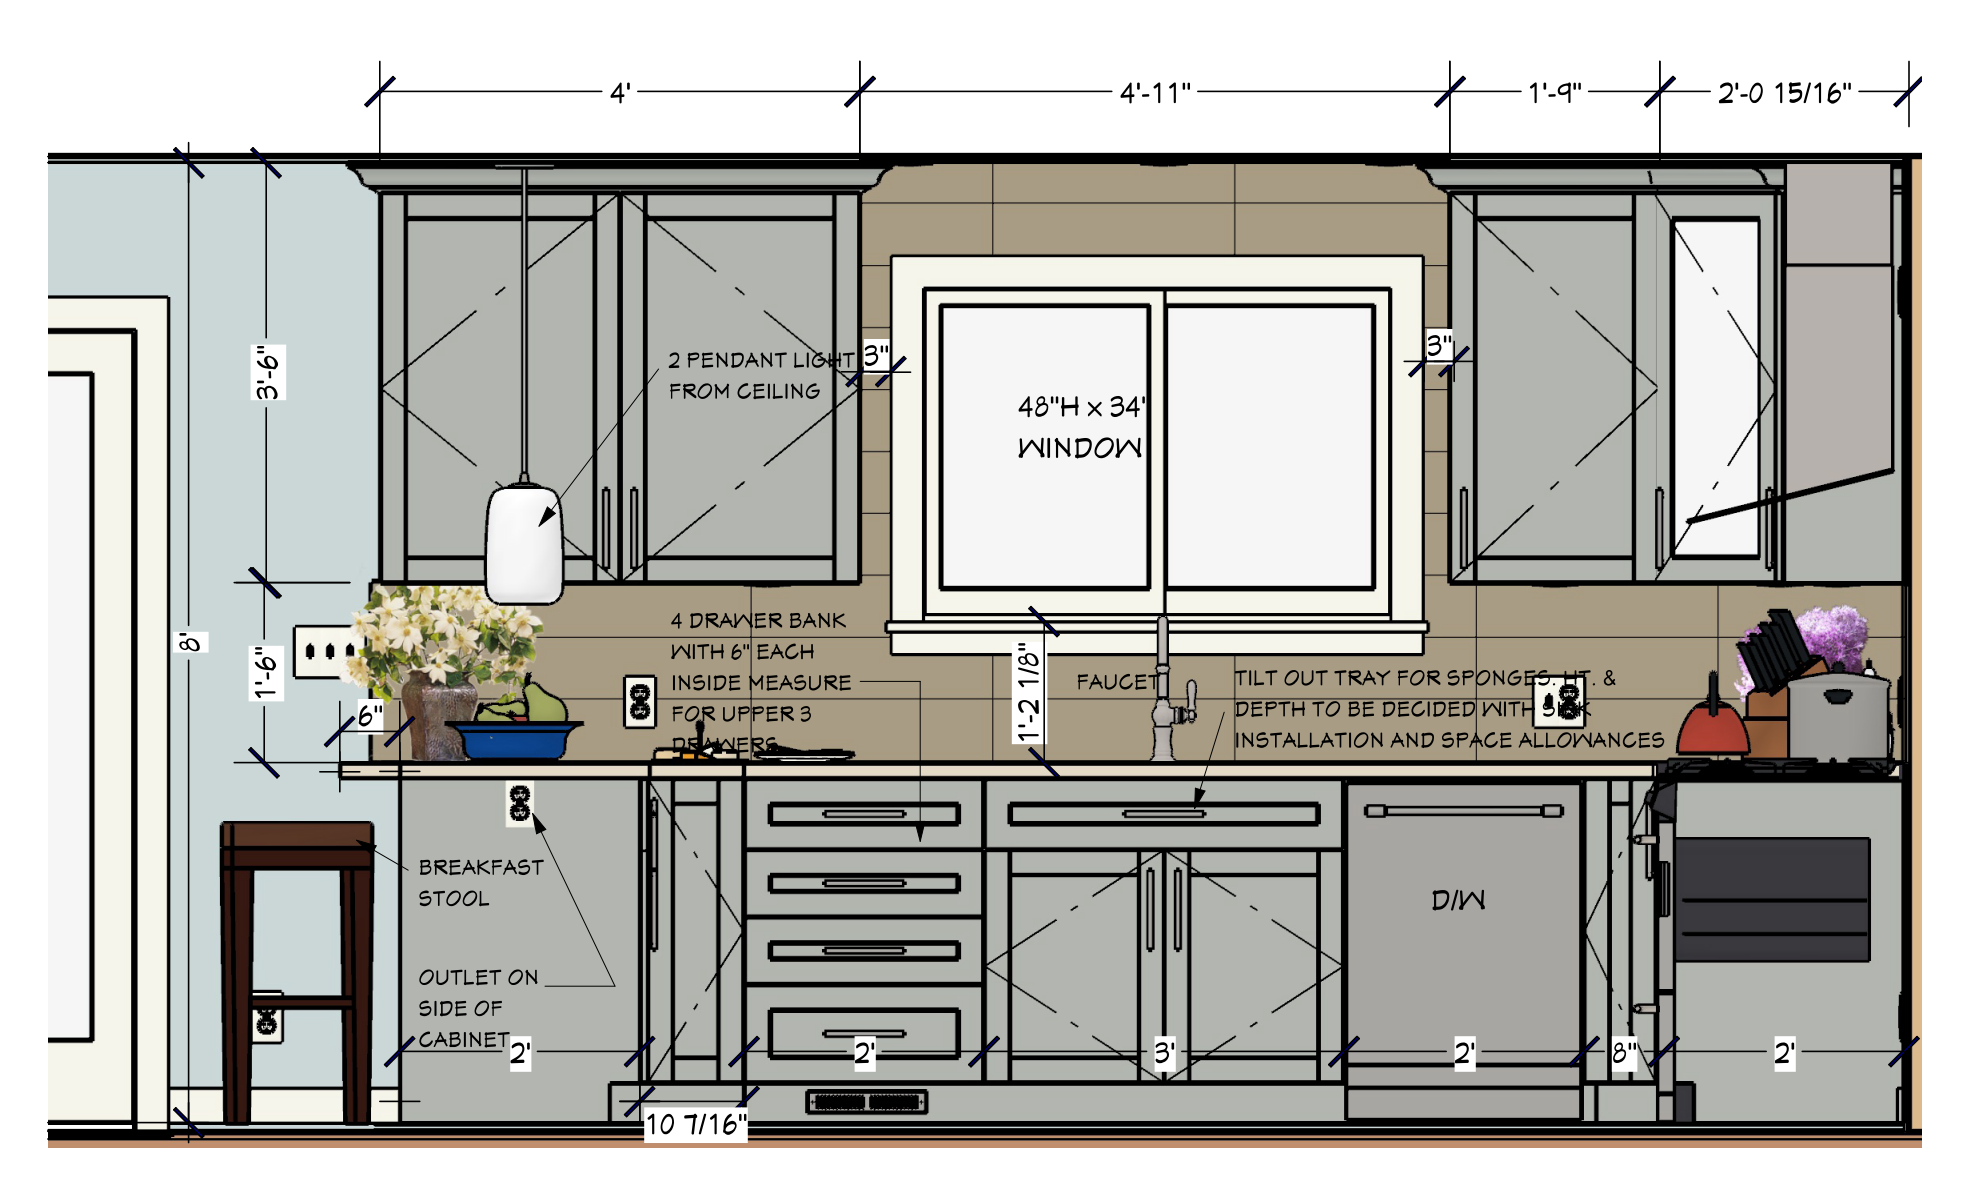
Final Designs are detailed for Construction. Dimensioned Drawings, notes and instruction help trades and contractors understand the process
All required large size drawings with elevations, millwork, lighting, electrical, plumbing are produced
Cabinetry schedules, electrical schedules, material scheme, realistic budgets, work schedules and all the nitty gritty details are taken care of


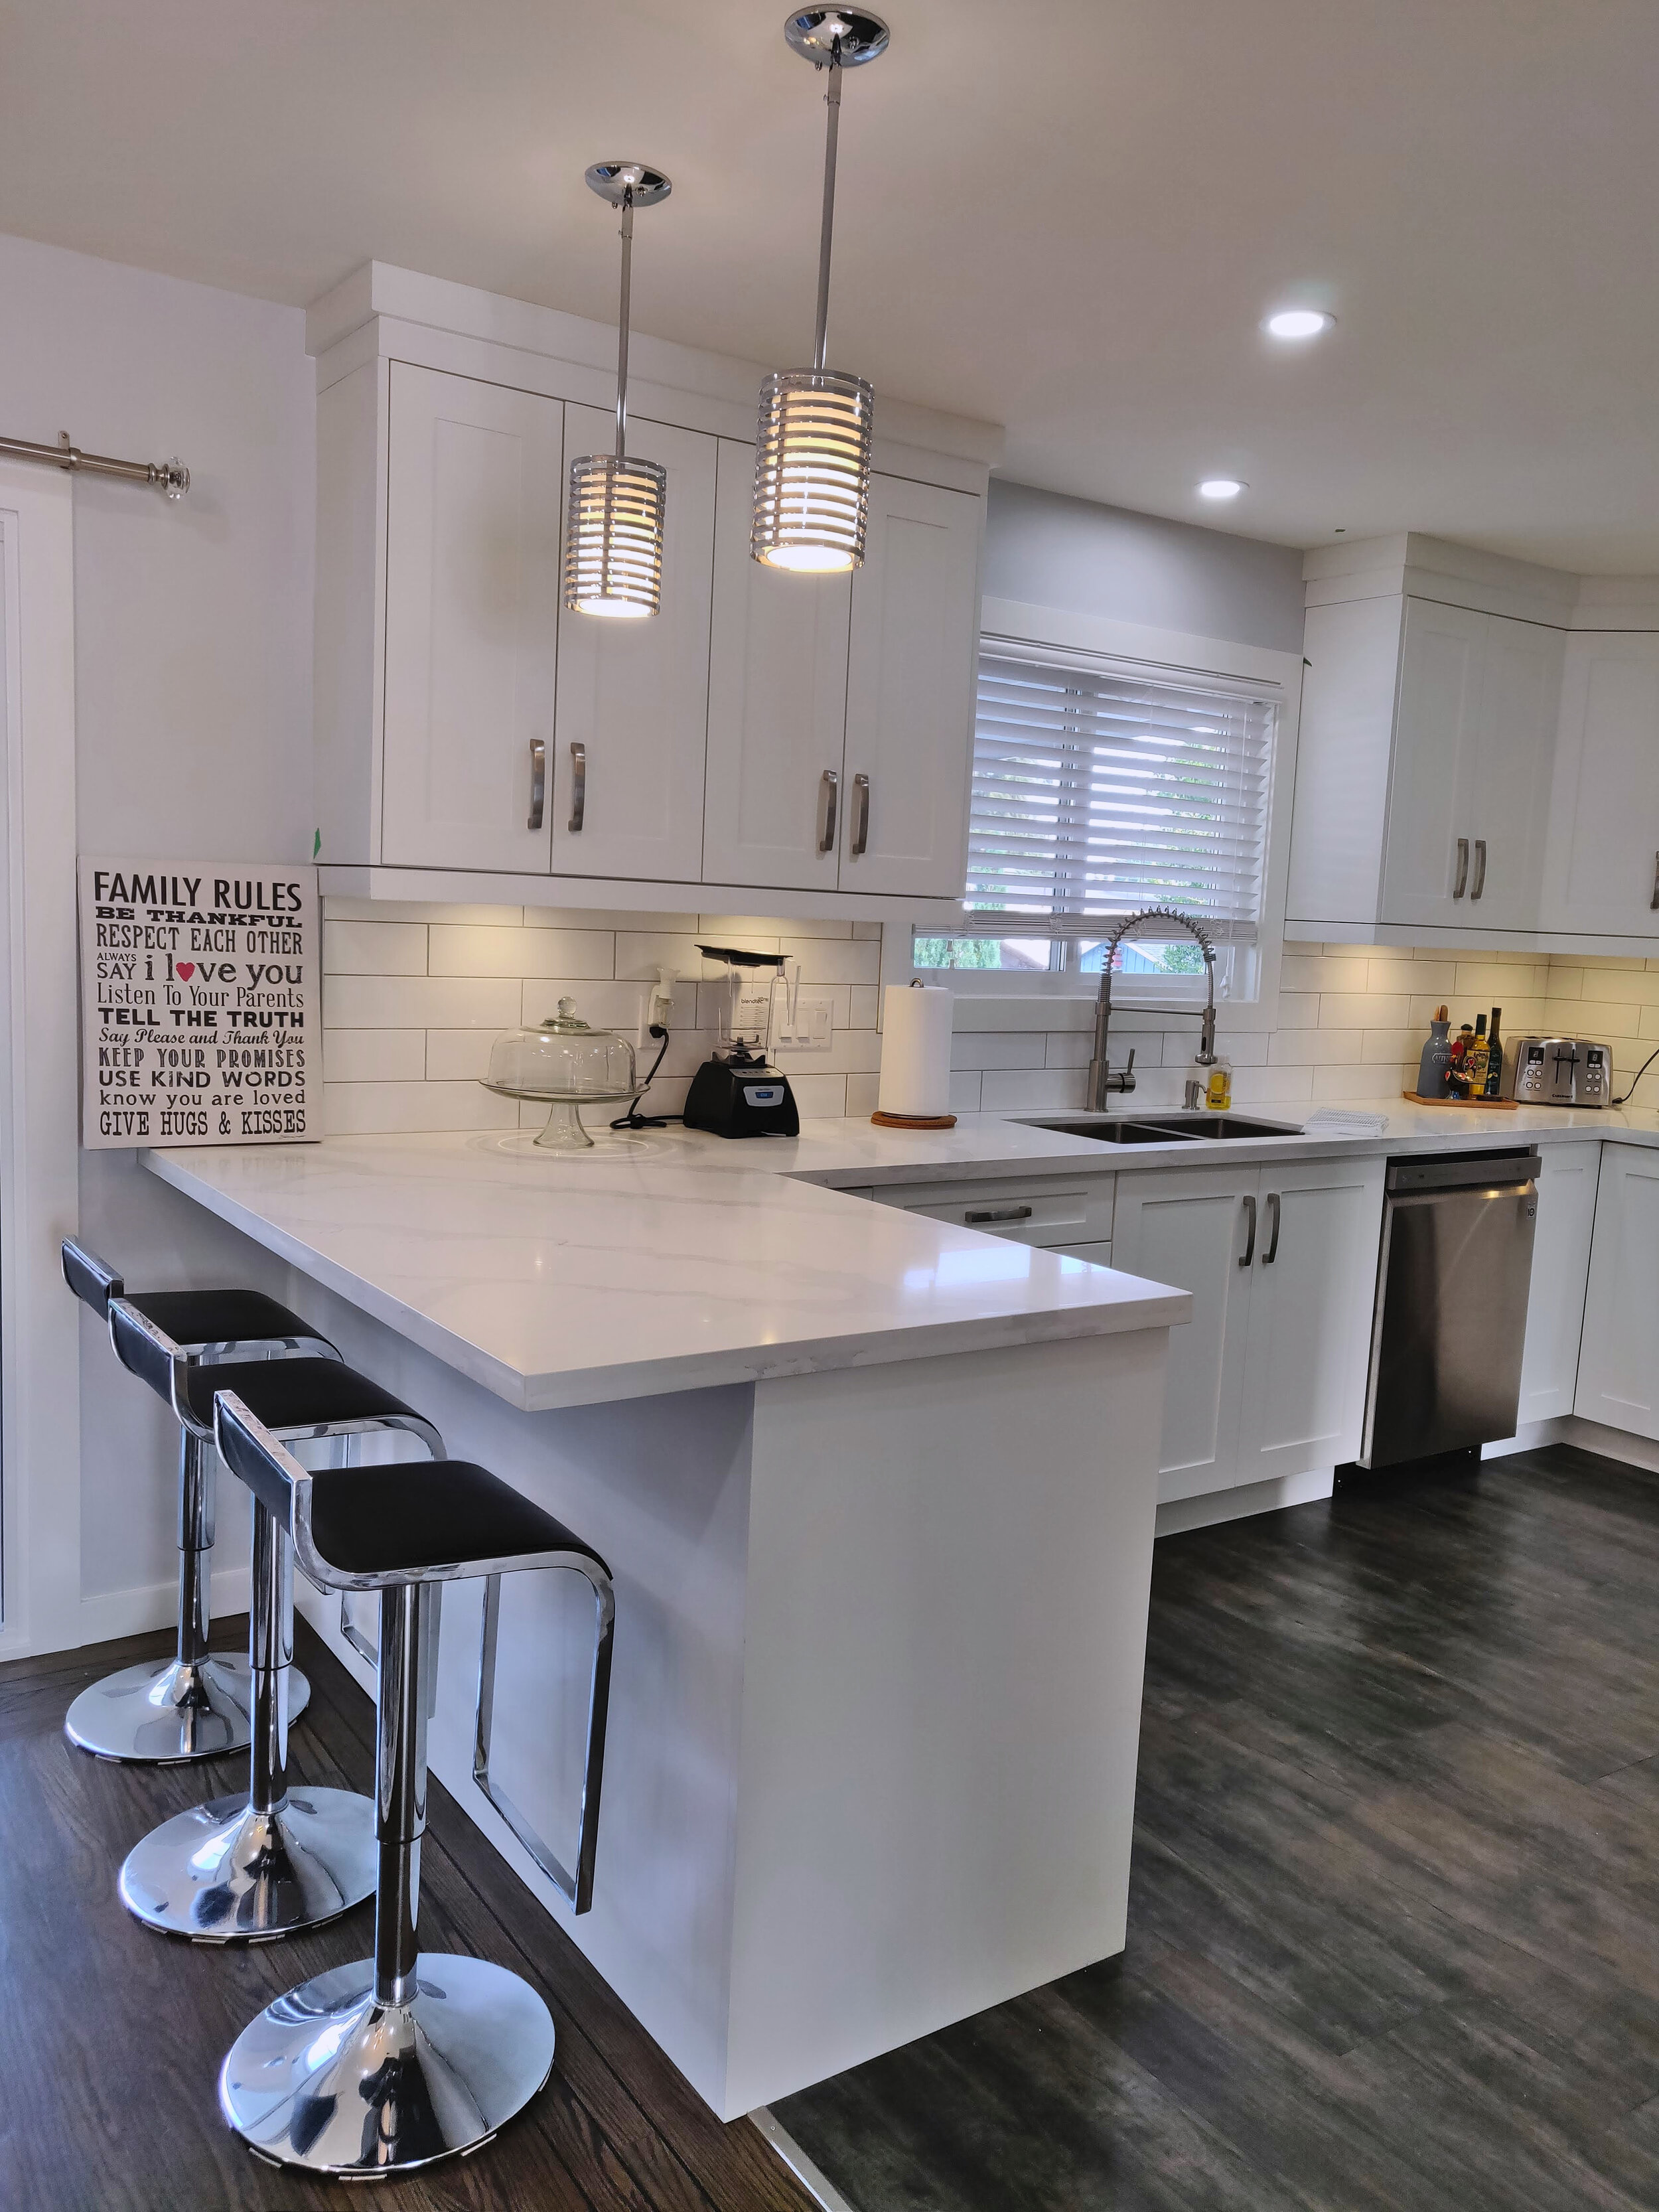
6. Final Result:
Space is ready for final checklist & walkthrough
Styling & accessorizing is done - not too heavy, just enough!
Photo Shoot Day for Project


See more of our Design Process and get the details.
In case you want to see more finished photos of the Kelvin Kitchen Project